Jan 17, 2018

Top 5 Free Unity Assets

The Unity Asset Store is a treasure chest of awesome tools for building games. Most of the offers are paid, but did you know that there are some powerful and very useful assets released for free? Such quality solutions are not only friendly to budget-sensitive indie developers but often beat the paid offers in terms of usability. On top of all, the free Unity Assets are a great way to get started with serious Unity game development.
Here is our list of the Top 5 Best Free Assets on the Unity Store!

1. iTween – Free Unity Scripting Library.

iTween is a free and feature-rich animation system for Unity. It is one of the first assets I personally add to a new game project. It grants you access to dozens of useful functions which help you animate the exposed (i.e. public) values of any component!
iTween Unity Asset Path Example
Let’s say you want to move an object along a path. One way to do that is to create waypoints (empty gameObjects) and then use iTween to move your object from one waypoint to the next. Here is an example of how simple this is to accomplish with the tween library:
And that’s it! Your object will move reliably following the waypoints. You can explore the many uses of iTween in its detailed Documentation.

2. ProBuilder Basic – Free Unity 3D Modeling Editor Extension.

ProBuilder Basic Unity Asset Example
Build the geometry of your game levels directly in the Unity editor! Whether you need to create a quick prototype of your game, or to go deep into world-building, ProBuilder Basic is capable and easy to use.
The fact that you are working in the Unity Editor and not inside an external program means you can play-test everything instantly. A huge time-saver and an awesome asset!

3. “Unity-chan!” Model – Free Unity 3D Character Model.

Unity Chan 3D Model Asset Example
As far as characters go, the Kohaku Ootori Unity 3D model is one of the cutest and most skillfully designed on the Asset Store. Kohaki comes with 31 animations, 31 still poses, 12 Emotions making from blend shapes and beautiful textures and shaders.
You can use the cute 3D girl in your finished game or just as a nice model to look at in your prototype :).

4. Tanks! – Free Unity Sample Project – Tutorial.

Tanks Unity Asset Two Players Example
Of all Unity Tutorial projects this one is my favorite – it is a great introduction to Game Planning, Physics, Inputs and Audio Mixing. And on top of that – the completed project is a fun little game for two players.
The idea is so good, that ever since I played it, I’ve wanted to create a published spin-off :). Download it, follow along the tutorial if you are new to Unity, or just use it as inspiration for your next game!

5. Absolutely Free Music – for use in your Unity games.

The importance of game music is too often underestimated by aspiring game developers. The Audio atmosphere should not be an afterthought, as it can noticeably improve the gaming experience. A good place to start are the audio track in the Absolutely Free Music Unity Asset. The pack includes 41 compositions in various genres – from rock and instrumental, to trance and ambient. A careful selection of these tracks would definitely make a prototype or even a finished product much more impressive!

This was our collection of most useful Free Unity Assets. Grab some of these free goodies and have fun building games! 🙂

Reference: https://ironic.games/unity-asset-store-reviews/top-5-free-assets

Unity Development: MonoDevelop vs Visual Studio

If you’ve ever researched the Unity MonoDevelop vs Visual Studio controversy on the programming forums, you already know how passionate developers can be about their favorite tools. Devotional praise and heated vitriol are spilling over the keyboards 🙂 . And since a lot of the posted opinions are contradictory, a starting developer in Unity can become anxious about which code editor is the right choice.

Let me put your mind at ease: it doesn’t matter all that much which IDE (integrated development environment) you start with. Yes, yes – this notion seems strange when the overwhelming consensus online is that there must be a Highlander type of battle to the death.
However, selecting a code editor really doesn’t need to be a soul-crushing dilemma. You won’t fail as a game developer for not using Visual Studio any more than you would fail as a novelist if you shrug off Microsoft Word.
Indeed, MonoDevelop and Visual Studio have their Pros and Cons. However, there is one important part which is lost in their comparison:

Both IDE solutions are perfectly capable of creating great Unity games!

With this in mind, let’s review the two options. MonoDevelop is a C# open source IDE for Windows and macOS. It is similar to NetBeans and Microsoft Visual Studio, but it is lighter and lacks some of their features. MonoDevelop is the default editor for Unity and thus fully integrated – a fact which makes the occasional bugs additionally irritating.
On the other hand, Visual Studio is a popular solution with all the bells and whistles of a complete IDE. However, even though the software itself is free, the lavish features come at a price. The Microsoft Visual Studio Community 2015 package is huge, adding 7.6GB to the Unity installation. It also takes up a lot more resources while running, which makes it sluggish and unresponsive on weaker PC configurations.
Now let’s review the key features of both programs.

MonoDevelop vs Visual Studio Community: Pros and Cons

1. Stability: winner Visual Studio.

Here the advantage is clearly on the side of Visual Studio. It is a very stable product with a long history of handling well massive projects. On the other hand, MonoDevelop, sort of, hangs in there. That said, you probably won’t see much of a difference when working on a small indie project.

2. Resources: MonoDevelop is ahead.

MonoDevelop takes the lead. We already mentioned that Visual Studio is a resource hog. You really need a current system with 12+ GB of RAM to have it work smoothly, which could be an issue for some laptop-bound developers (who should really upgrade, yada, yada). Anyway, as expected, the nimble MonoDevelop finishes ahead of Microsoft’s colossus.

3. Features: Visual Studio, hands down.

Well, this one goes to Visual Studio. It has a ton of free and paid plugins that extend its functionality. A popular example is JetBrains ReSharper, which automates your coding routines. MonoDevelop is way, way behind in this respect. Nevertheless, if you can’t name a single external plugin you need, you should be just fine with MonoDevelop.

4. Styling: Visual Studio is looking good.

OK, so again, Visual Studio wins this category. There are many more options to style your code and tweak it to your favorite look. In this respect, MonoDevelop is no thrills, just business. Which isn’t all that bad, I have to say – if it is your first IDE.

5. Documentation – both offer plenty.

There is abundant documentation for both. In general, there are much more developers worldwide using Visual Studio, so you would find more references online for it. Still, in both cases virtually any issue you find has probably been suffered and solved by bruised older coders.

The Final Judgement

Unbelievably, both MonoDeveloper and Virtual Studio are GOOD products (whaa?). Yes, and you are a lucky developer who lives in a time when you have a choice between multiple polished, well made IDEs for Unity. I personally started out with MonoDevelop, tried Visual Studio, had some issues there, and went back to MonoDevelop (this is also allowed, fellas). So don’t sweat this decision like it is the make or break point of your game developer’s career – it isn’t. Instead focus on utilizing the features available in your IDE of choice and on writing better code – honestly, this is way, way more important.
And since both MonoDeveloper and Virtual Studio are FREE, I suggest that you try them for yourself and see which one YOU like :). Then come online and tell us all where we are wrong, because this is the Way of the Developer! ðŸ˜‰ Cheers!
A quick note for Mac users: while Visual Studio Community isn’t available on macOS, there are a couple of other options worth checking out: Sublime Text Editor and Visual Studio Code. They are both modest code editors and not full blown IDEs, but if you really can’t stand MonoDevelop for some reason, you can give them a shot.

Reference: https://ironic.games/coding-games/unity-development-monodevelop-vs-visual-studio

Unity Personal vs Unity Plus vs Unity Pro vs Enterprise

Should I Use a Free or Paid Unity License

Which Unity license should I get? A reasonable question. Unity comes in several varieties and depending on your goals, you will need a different license. Two questions arise most frequently:
1) Should I get a paid version (Unity Personal vs Unity Plus)?
2) Is it worth investing in a Pro version (Unity Plus vs Unity Pro)?
Let’s do an overview of each license and make a quick comparison.

Unity Personal License

The Unity Personal license is free, and as such seems the best deal of the four :). If you are completely new to Unity, starting with it is a no-brainer.
The free version is marketed as a tool for students and beginners. However, it still contains most of the features which make Unity such a great platform for game development. Most importantly, you get advantage of the full power of the Unity Game Engine. Also, with Unity Personal you can still export to all supported platforms.
The one key feature of the Unity Personal License is that it is free. You can use it as long as you make less than $100K in annual gross revenues (indeed, having more than that would be a nice problem to have). There are no royalties whatsoever.

Unity Plus License

If you plan to monetize the games you create, getting a paid Unity subscription is a must. The Unity Plus license is the most affordable one at $35 per month. Even at that relatively low price, it has several features which will make a big difference.

Unity Plus License Key Features:

  • Custom Splash Screen. It is impossible to overstate how important it is to be able to remove the default “Made with Unity” splash screen which comes with Unity Personal edition. The Unity brand itself still has a bad reputation due to the thousands of low quality games released with the free version. If you want to make games which make money, get rid of the default screen – it screams “CHEAP GAME”!
  • Performance Reporting. This additional service allows you to collects game errors in real time – from all devices and platforms. The service will alert you to bugs and bad performance immediately – quite cool! Thus you could avoid the bad reviews which inevitably come if such issues are not addressed.
Other Unity Plus features include Enhanced Analytics, Priority Queue of Cloud Build and the option to support 50 Concurrent Users in Multiplayer. In addition, you get the dark Unity Editor Skin so you can feel like a real game developer :P.

Unity Pro License

If your annual revenue or money raised is over $200K, you should look into buying a Unity Pro license. To get real value out of it, you should have good funding and work on ambitious game projects.

Unity Pro License Key Features:

  • Scalability. With Pro there is no limit on revenue. Shoot for the moon! 🙂
  • Premium support. If you need help with any Unity-related issues, you can count on the Unity support team to help you immediately.
Other Unity Pro features include Multiplayer support of 200 concurrent users, and In-game Analytics up to 50GB/mo raw data export.

Unity Enterprise License

If you have a team of over 21 people (wow, well done!), Unity can work together with you to create a custom solution. One of the benefits here is access to the Unity source. The option to modify the source would give you full control over the game performance. You can also negotiate the pricing and get volume discounts.
That said, it is unlikely that a single game developer, or even a small team would need a Unity Enterprise License. This license is suited for a big studio with a large team and deep pockets.

Unity Licenses Comparison and Advice

When starting out with Unity, by all means go with the free version. You can spend any extra funds on acquiring Unity Assets that can speed up your workflow. However, if you are serious about game development, get at least Unity Plus. It will give you the performance reporting and the custom splash screen, which you would definitely need. If you are just starting out with making games, you don’t really need Unity Pro though. You can always upgrade later, so don’t go right away for the more expensive licenses.
Check out the different licenses and decide which one is best suited for you. Treat this decision as an investment – do you plan to make money creating games? As far as investments go, for a game developer getting a paid Unity license is definitely a good one :).
View all details about the Unity licenses on the Unity website.
 
 
 Reference: https://ironic.games/coding-games/unity-personal-vs-unity-plus-vs-unity-pro-vs-enterprisehttps://ironic.games/coding-games/unity-personal-vs-unity-plus-vs-unity-pro-vs-enterprise

Best Pathfinding Tools in Unity 3D

Unity NavMesh vs Apex Path vs A* Pathfinding Project

Update June 2017: Unity 5.6 comes with improved NavMeshes! They are now component-based, allowing for multiple NavMeshes per scene. In addition, procedurally generated and dynamically loaded content is now supported – just generate the level and set the NavMesh to Bake! 😉
Hey fellow game developer, what kind of games do you want to make?
Do you dream of creating huge open worlds, full of complex and compelling characters? Do you want to give your players whole armies to engage in massive real-time battles? Or, alternatively, do you prefer to work on the fast-paced action of first person shooters?

Here Enters Unity Pathfinding

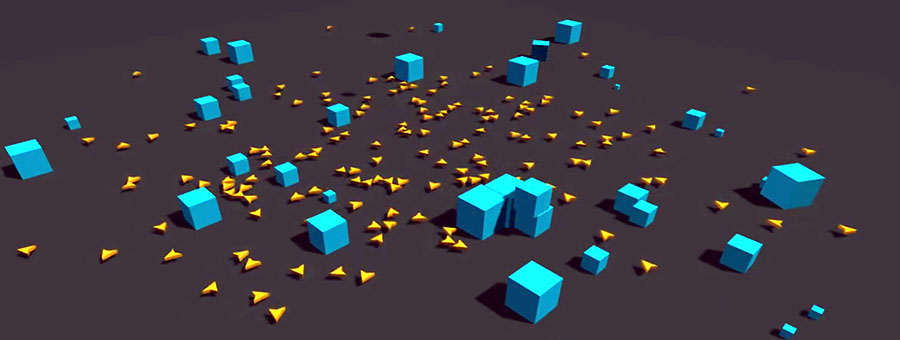
The common trait of all these genres is that your AI units need to navigate the game world. Furthermore, they need to move efficiently and with purpose. Further still, the computer controlled units should not get stuck, rotate in a circle or bump foolishly into other objects! For an immersive player experience,  it is critical for all units to “stay in character”! But how do we, as game developers, make the AI characters react and adjust to the changing game environment?
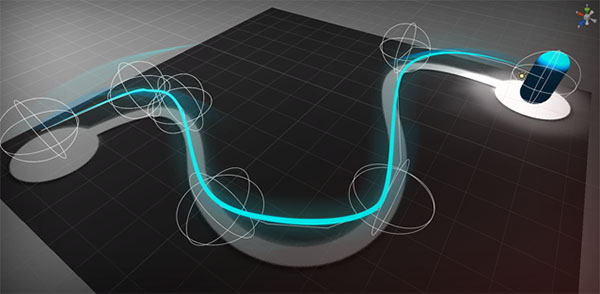
We do it by using Pathfinding. Pathfinding is the collection of tools and techniques for moving units in the game world. There are multiple ways to implement it in your game, and in this post we’ll review the 3 most popular. We’ll compare Unity’s default NavMesh solution with the two most popular pathfinding Unity assets – A* Pathfinding (available here) and Apex Path (available here).

The Built-in Unity NavMesh Agents

Unity’s default solution is the NavMesh. We can bake a Unity NavMesh from the geometry in our scene (Window -> Navigation). The baking process defines the accessible areas based on the Render Meshes of the static Game Objects. After that we can add NavMesh Agent components to our moveable characters and let them roam freely around the level:).
The built-in tools are free and straight-forward to set up. However, there are multiple issues with the Unity Navmesh. The first major problem is that the mesh is baked in advance, so it can’t be changed at runtime. In result, any shape-changing dynamic objects and obstacles won’t work correctly.
Additionally, the Unity NavMesh can’t handle procedurally generated game worlds. So, if your game depends on that feature, or even if you use levels which expand gradually, you are better off using a more capable pathfinding asset. On top of that, there are some performance issues with dynamic obstacles and massive amounts of units are present on the scene.
To sum up, Unity NavMesh works great for simple games without special pathfinding requirement. Anything beyond that, and you are much better off using a dedicated Pathfinding Unity Asset.

Pathfinding Unity Assets Comparison

As you know, the Unity Asset Store offers a treasure trove of powerful tools enhancing the Unity platform. With regard to pathfinding, two systems stand head and shoulders above the rest: A* Pathfinding Project Pro and Apex Path. Both assets are popular and battle-proven; they also integrate well with visual scripting systems like Playmaker and AI frameworks like Behavior Designer.
Both Pathfinding tools are capable and would serve you well, but they do differ in several key aspects. Let’s review their pros and cons to figure out which one is best suited for your project.

Apex Path

Apex Path is a great looking, grid-based pathfinding library. It contains a clean, well organized codebase and is packed with useful features. Let’s mentions just some of them: Load balancing, Multi-threading, Height maps, Basic Steering with local avoidance and Patrol routes. Additionally, the developers of Apex Path offer other (paid) modules like Apex Steer which extend the functionality of the asset.
Unity Pathfinding Apex Path Example dynamically generated objects

Its approach to pathfinding is grid-based, which means that you don’t need to bake anything in advance. Consequently, Apex Path is suitable for dynamically changing and procedurally generated game worlds (although larger RTS-style worlds can hit some performance issues). It also implements “portals” to allow units to travel between different navigation grids.
However, the biggest strength of Apex Path – the strictly enforced coding conventions – can sometimes become its weakness. The asset is clearly created with great care and precision, but it enforces a proprietary way of programming and makes you adapt to its rules. Just as an example, you would need to use Apex Path’s custom static methods instead of Unity’s AddComponent. At times, this level of abstraction makes the asset look a little over-engineered. Depending on the level of your programming abilities, and whether you would be OK with having to learn a different way of doing things, this may or may not be an issue for you. In any case, their support is quick and attentive, so even if you face issues with the scripting side of things, you would be in good hands.
To sum up, if you are looking for plug-and-play pathfinding solution for small maps (e.g. for FPS games), and you are ready to incorporate Apex Path in your project from the start, this is as good as it gets. However, already advanced projects, or projects which require larger maps, would generally be better served by other solutions.

A* Pathfinding Project Pro

A* Pathfinding (you can also see it as Astar or A Star Pathfinding) is the benchmark for quality pathfinding in Unity. Currently in its 4th version, Astar Pathfinding has a stellar 5 star rating on the Unity Asset Store from over 500 reviewers. It loads extremely quickly and is, frankly, easier to use than Unity’s default tool.
Unity Pathfinding A* Pathfinding Project Pro Example with platforms
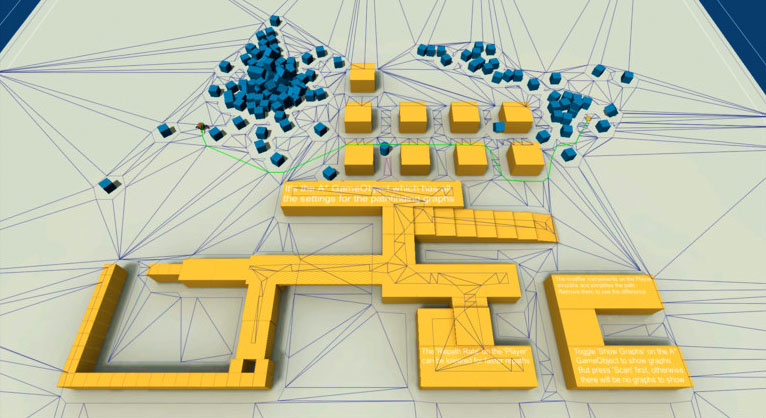
The technical details are impressive. The asset supports automatic NavMesh generation and is fully multi-threaded. It offers a selection of 3 different navigation graphs (NavMesh, Grid and Point Graph), plus various types of path post-processing and local avoidance in both the XZ and XY planes. It comes with the full source code and, of course, supports dynamic updates of the graphs at runtime.
But even after this list of accomplishments, my favorite thing about A* Pathfinding is how easy it is to use. For example, a pathfinding call takes just a couple of lines of code:
And the good stuff doesn’t end there. Astar Pathfinding comes with 16 example scenes introducing its many features, so you can hit the ground running. The author of the asset, Aron Granberg, is also very active and helpful in responding to all kinds of questions about A* Pathfinding online at forum.arongranberg.com.

Conclusion

In order to handle Pathfinding in Unity correctly, you need to use the right tool. Hopefully now know you enough details to figure out whether you need to use Unity’s default NavMesh, or choose a dedicated Pathfinding asset. Good luck with the development and try to stay on the right path! 🙂
View more details about A* Pathfinding Project and Apex Path in the Unity Asset Store.

 Reference : https://ironic.games/unity-asset-store-reviews/unity-navmesh-vs-a-star-pathfinding-vs-apex-path

Jan 4, 2018

Run 2 Steam Accounts on One Computer

Need an extra DD account for storage space or want to run 2 steam games at once? Sandboxie makes it easy.

Intro

Ever play a game and wish you could have a second account for extra space, use as AFK shop or be able to trade with someone without having to leave your game? Sandboxie makes it easy.

Sandboxie allows you to run a self contained copy of steam on your computer along side your main install. Sandboxie has many other uses but I found it to be very useful when needing to run my second DD account and my other computer was otherwise engaged.

This guide is designed to help walk you through the setup and be able to use another DD account, or any other game account, on the same computer as your main account.

DISCLAIMER: This may not work for all games.

NOTE: This guide was mostly put together by another player but he didn't care to be named. Will gladly give him all the credit for this when he doesn't mind being mentioned

Requirements

  • An extra steam account (this does not allow you to run your main account twice)
  • An extra copy of the game. Family share wont work since you can play both at once. I recommend buying extra copies of your favorite game when steam has its sales or through humblebundle.

Folder Setup and Game Copy

Creating a new folder and copying the game files over is typically recommended but you can use the existing folder to save space if needed. Skip to next section if you want to use your current folder.

  • Open up your Program Files directory where your Steam installation is (eg, C:\Program Files (x86)\)
  • Create a new folder, I named mine "SteamSand" to make it simple.
  • Now go into your normal Steam folder (eg, C:\Program Files (x86)\Steam\)
  • Copy the folder "SteamApps" and file "Steam.exe" and Paste them into your SteamSand folder (eg, C:\Program Files (x86)\SteamSand\)
  • Remember to COPY&PASTE, Do not MOVE. This can take a while depending on how many games you have installed. We'll leave this alone for now and come back later. 

Sandboxie Setup

  • Now, Download SandBoxie from their website SandBoxie.com
  • Install and Run SandBoxie
  • When it's open, At the top click "Sandbox" and "Create New Sandbox"
  • Name it whatever you want, I named mine "Steam" Then Click OK
  • Once you've clicked OK, You'll see the new sandbox appear in the list, Right click on it and click "Sandbox Settings"
  • In Settings, Click the + next to "Resource Access", Then the + next to "File Access", Now click "Full Access"
  • Now click the "Add" button and Browse to the previously created "SteamSand" folder. Click on your "SteamSand" folder and Click OK.
  • Click Apply and then OK
  • There will be a popup stating you changes configuration blahblahblah, Just click OK.

How to Run

  • Now go back to that "SteamSand" folder, Right click on "Steam.exe" and click "Run Sandboxed"
  • You'll get a popup which will have you chose which Sandbox to run it with. Click on your "Steam" sandbox and click OK. (You may need to select the UAC check box as well)
  • Steam will now open and prompt you to Login. Login with whatever account you want (Most likely your 2nd account)
  • Steam will automatically download all the missing files we didn't copy.
  • Done

Note: It is best to create a shortcut on your desktop to the "Steam.exe" file in your "SteamSand" folder and name it something like "Steam - Sandbox" as you will ALWAYS have to Right click -> Run Sandboxed.

Important Notes

There are several things to know about sandboxie that many have asked about since I wrote this originally.

  • Sandboxie is free to use for 1 extra account. If you want to make 2 or more accounts using sanboxie then you must pay for it.
  • You cannot host 2 private games on the same computer. You can join your main tavern with the second account and vice versa though.
  • If running in Windowed mode, your cursor may move outside the window. I have accidentally closed my main window before when running around a map shooting. To get around this, play full screen on your main account.
REFERENCE: https://steamcommunity.com/sharedfiles/filedetails/?id=311943358


WPF Error 40 BindingExpression path error: property not found on 'object'

On XAML, I created a datatemplate with binding for an object called Skills.
And I set the datatemplate in my C# program on a ListViewItem like this:

DataTemplate template = (DataTemplate)this.FindResource("SkillListItem");
ListViewItem litem = new ListViewItem();
litem.ContentTemplate = template; 

And on visual studio I got this error:
WPF Error 40 BindingExpression path error: 'Name 'property not found on 'object' Skill

It is a strange error that can solve by changing
public string Name;
 
to this
public string Name{ get; set; }


Visual Studio Keyboard Shortcuts

Playing with keyboard shortcuts is very interesting and reduce the headache of using the mouse again and again while programming with visu...