But how does one create a save file and what should be in it? Do you need to use a save file to keep track of player settings too? What about submitting saves to the web so they can be downloaded later on a different device?
In this tutorial you will learn:
- What serialization and deserialization are.
- What PlayerPrefs is and how to use it to save player settings.
- How to create a save game file and save it to disk.
- How to load a save game file.
- What JSON is and how you would use it.
Note: If you are new to Unity or looking to pick up more Unity skills, you should checkout out our other Unity tutorials where you can learn about lots of Unity topics from C# to how the UI works.
Getting Started
Download the starter project here. You will be implementing the code for saving and loading the game, as well as the logic for saving the players settings.Important Save Concepts
There are four key concepts to saving in Unity:PlayerPrefs: This is a special caching system to keep track of simple settings for the player between game sessions. Many new programmers make the mistake of thinking they can use this as a save game system as well, but it is bad practice to do so. This should only be used for keeping track of simple things like graphics, sound settings, login info, or other basic user-related data.
Serialization: This is the magic that makes Unity work. Serialization is the conversion of an object into a stream of bytes. That might seem vague but take a quick look at this graphic:
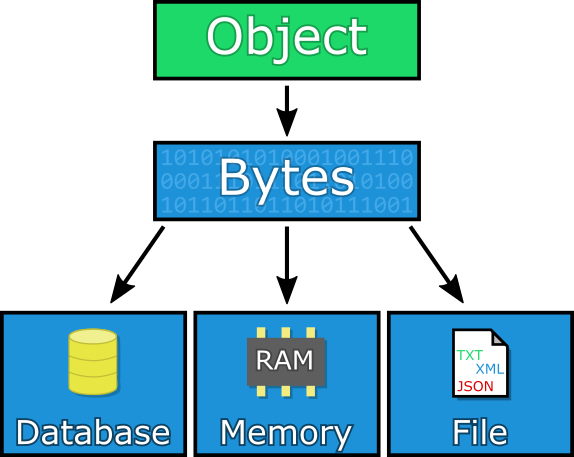
What is an “object”? In this case an “object” is any script or file in Unity. In fact, whenever you create a MonoBehaviour script, Unity uses serialization & deserialization to convert that file down to C++ code and then back to the C# code that you see in the inspector window. If you’ve ever added
[SerializeField] to get something to appear in the inspector, you now have an idea of what’s going on.
Note: If you’re a Java or web developer, you
might be familiar with a concept known as marshalling. Serialization and
marshalling are loosely synonymous, but in case you’re wondering what a
strict difference would be, serialization is about converting an object
from one form to another (e.g. an object into bytes), whereas
marshalling is about getting parameters from one place to another.
Deserialization: This is exactly what it sounds like. It’s
the opposite of serialization, namely the conversion of a stream of
bytes into an object.JSON: This stands for JavaScript Object Notation, which is a convenient format for sending and receiving data that is language agnostic. For example, you might have a web server running in Java or PHP. You couldn’t just send a C# object over, but you could send a JSON representation of that object and let the server recreate a localized version of it there. You’ll learn more about this format in the last section but for now just know that this simply a way of formatting data to make it multi-platform readable (like XML). When dealing with converting to and from JSON, the terms are JSON serialization and JSON deserialization respectively.
Player Prefs
This project has been set up so that all you will focus on is the logic for saving and loading games. However, if you are curious how it all works, don’t be afraid to open all the scripts and see whats going on, and feel free to ask a question here or in the forums if you need help.Open the project, then open the Scene named
Game and then click play. 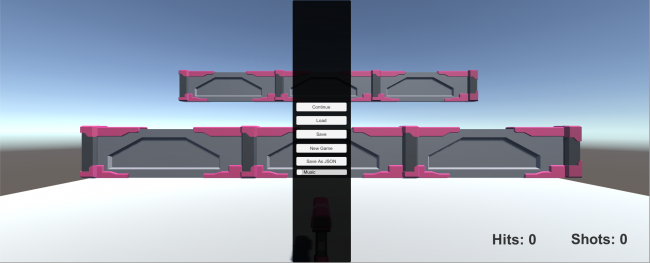
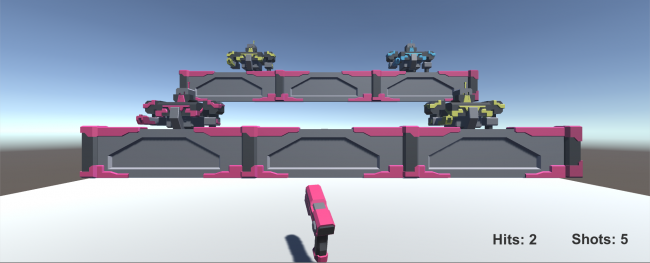
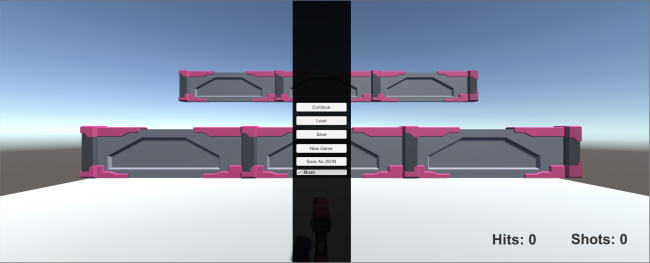
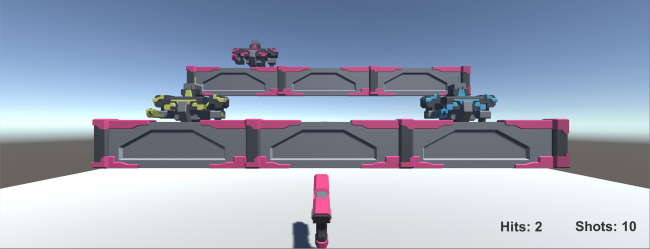
To start a game, click the New Game button. To play the game, you simply move your mouse, and the gun will follow your movement. Click the left mouse button to fire a bullet and hit the targets (which flip up and down at various time intervals) to get points. Try it out and see how high a score you can get in 30 seconds. To bring up the menu at any time, press the escape key.
As fun as that game was, it might have been a little dry without music. You may have noticed that there is a music toggle, but it was switched off. Click play to start a new game, but this time click the Music toggle so it’s set to “On”, and you will hear music when you start your game. Make sure your speakers are on!
Changing the music setting was simple, but click the play button again and you’ll notice a problem: the music is no longer checked. While you did change the music setting earlier, there was nothing keeping track of that change. This is the kind of thing that PlayerPrefs excels at.
Create a new script named PlayerSettings in the Scripts folder. Since you’ll be using some UI elements, add the following line at the top of the file with the other namespaces:
using UnityEngine.UI;
Next, add the following variables:[SerializeField]
private Toggle toggle;
[SerializeField]
private AudioSource myAudio;
These will keep track of the Toggle and AudioSource objects.Next add the following function:
  public void Awake ()
  {
    // 1
    if (!PlayerPrefs.HasKey("music"))
    {
      PlayerPrefs.SetInt("music", 1);
      toggle.isOn = true;
      myAudio.enabled = true;
      PlayerPrefs.Save ();
    }
    // 2
    else
    {
      if (PlayerPrefs.GetInt ("music") == 0)
      {
        myAudio.enabled = false;
        toggle.isOn = false;
      }
      else
      {
        myAudio.enabled = true;
        toggle.isOn = true;
      }
    }
  }
When set up, this will:- Check if the PlayerPrefs has a cached setting for the “music” key. If there is no value there, it creates a key-value pair for the music key with a value of 1. It also sets the toggle to on and enables the AudioSource. This will be run the first time the player runs the game. The value of 1 is used because you cannot store a Boolean (but you can use 0 as false and 1 as true).
- This checks the “music” key saved in the PlayerPrefs. If the value is set to 1, the player had music on, so it enables the music and sets the toggle to on. Otherwise, it sets the music to off and disables the toggle.
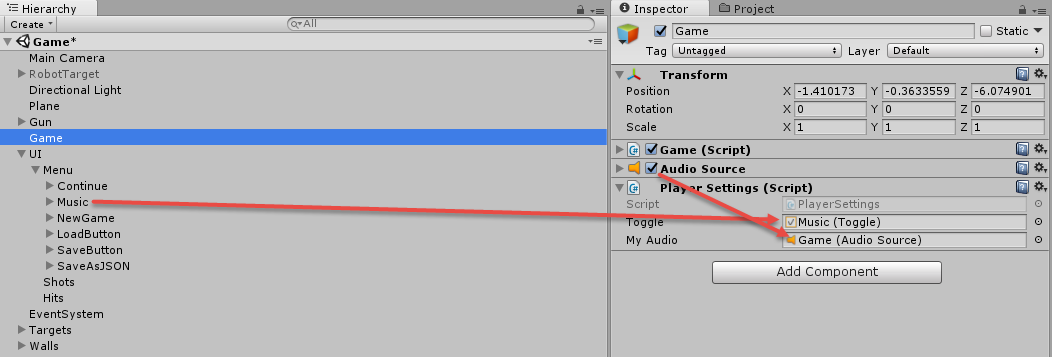
Add the
PlayerSettings script to the Game GameObject. Then expand the UI GameObject, followed by the Menu GameObject to reveal its children. Then drag the Music GameObject on to the Toggle field of the PlayerSettings script. Next, select the Game GameObject and drag the AudioSource over to the MyAudio field. <
The music is set up to work when the game runs (since there is code in the Awake function), but you still need to add the code if the player changes the setting during gameplay. Open the PlayerSettings script and add the following function:
  public void ToggleMusic()
  {
    if (toggle.isOn)
    {
      PlayerPrefs.SetInt ("music", 1);
      myAudio.enabled = true;
    }
    else
    {
      PlayerPrefs.SetInt ("music", 0);
      myAudio.enabled = false;
    }
    PlayerPrefs.Save ();
  }
This does almost the same as the code you wrote earlier, except it
has one important difference. It checks the state of the music toggle
and then updates the saved setting accordingly. In order for this method
to be called, and thus for it to be able to do its work, you need to
set the callback method on the Toggle GameObject. Select the Music GameObject and drag the Game GameObject over the object field in the OnValueChanged section: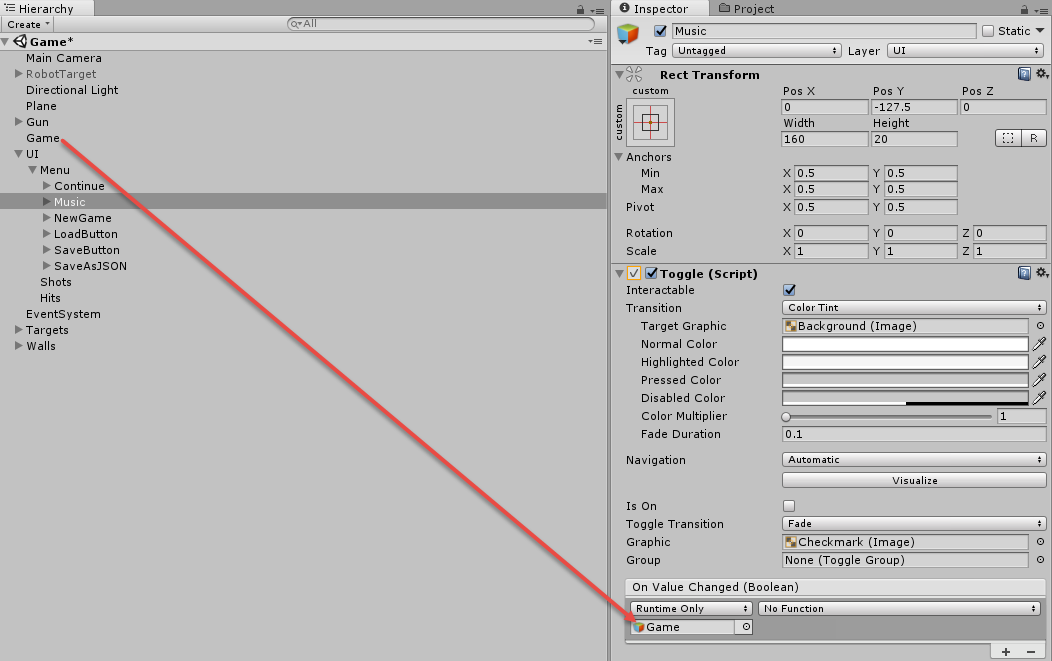
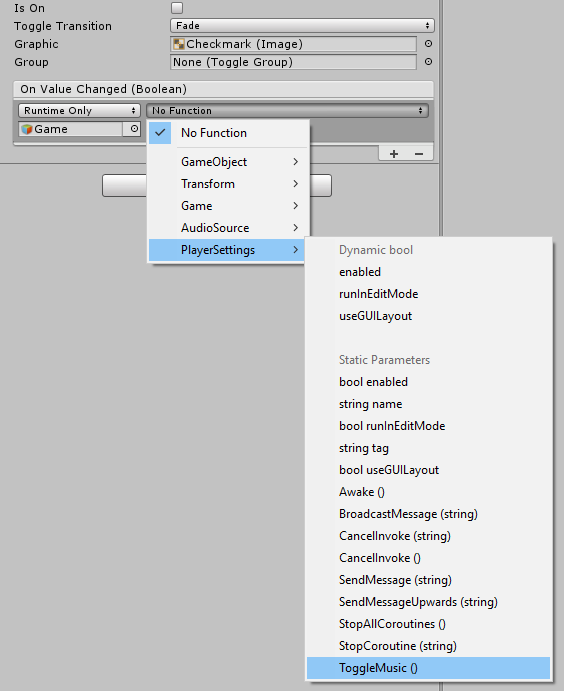
Select the dropdown which currently says No Function, and select PlayerSettings -> ToggleMusic(). When the toggle button in the menu is pressed, it will call the ToggleMusic function.
Now you’ve got things set up to keep track of the music setting. Click Play and try it out by setting the music toggle to on or off, then ending the play session and starting a new play session.
The music setting is now properly saved! Great job — but you’re only getting started with the power of serialization.
Saving The Game
Using PlayerPrefs was pretty simple wasn’t it? With it, you will be able to easily store other settings in there such as the player’s graphic settings, or login info (perhaps Facebook or Twitter tokens), and whatever other configuration settings make sense to keep track of for the player. However, PlayerPrefs is not designed to keep track of game saves. For that, you will want to use serialization.The first step to creating a save game file is creating the save file class. Create a script named Save and remove the
MonoBehaviour inheritance. Remove the default Start() and Update() methods as well.Next, add the following variables:
public List<int> livingTargetPositions = new List<int>();
public List<int> livingTargetsTypes = new List<int>();

public int hits = 0;
public int shots = 0;
In order to save the game you will need to keep track of where
existing robots are and what types they are. The two lists accomplish
this. For the number of hits and shots you are just going to store those
as ints.There is one more very important bit of code you need to add. Above the class declaration, add the following line:
[System.Serializable]
This is known as an attribute and it is metadata
for your code. This tells Unity that this class can be serialized, which
means you can turn it into a stream of bytes and save it to a file on
disk.
Note: Attributes have a wide range of uses
and let you attach data to a class, method, or variable (this data is
known as metadata). You can even define your own attributes to use in
your code. Serialization makes use of the
The entire [SerializeField] and [System.Serializable]
attributes so that it knows what to write when serializing the object.
Other uses for attributes include settings for unit tests and dependency
injection, which are way beyond the scope of this tutorial but well
worth investigating.Save script should look like this:using System.Collections;
using System.Collections.Generic;
using UnityEngine;
[System.Serializable]
public class Save
{
public List<int> livingTargetPositions = new List<int>();
public List<int> livingTargetsTypes = new List<int>();
public int hits = 0;
public int shots = 0;
}
Next, open the Game script and add the following method:private Save CreateSaveGameObject()
{
Save save = new Save();
int i = 0;
foreach (GameObject targetGameObject in targets)
{
Target target = targetGameObject.GetComponent();
if (target.activeRobot != null)
{
save.livingTargetPositions.Add(target.position);
save.livingTargetsTypes.Add((int)target.activeRobot.GetComponent().type);
i++;
}
}
save.hits = hits;
save.shots = shots;
return save;
}
This code creates an instance of the Save class you made earlier and
then sets the values from the existing robots. It also saves the players
shots and hits.The Save button has been hooked up to the
SaveGame method in the Game script, but there is no code in SaveGame yet. Replace the SaveGame function with the following code:public void SaveGame()
{
// 1
Save save = CreateSaveGameObject();
// 2
BinaryFormatter bf = new BinaryFormatter();
FileStream file = File.Create(Application.persistentDataPath + "/gamesave.save");
bf.Serialize(file, save);
file.Close();
// 3
hits = 0;
shots = 0;
shotsText.text = "Shots: " + shots;
hitsText.text = "Hits: " + hits;
ClearRobots();
ClearBullets();
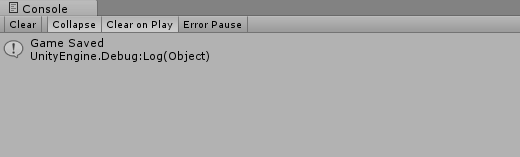
Debug.Log("Game Saved");
}
Taking it comment-by-comment:- Create a Save instance with all the data for the current session saved into it.
- Create a BinaryFormatter and a FileStream by passing a path for the Save instance to be saved to. It serializes the data (into bytes) and writes it to disk and closes the FileStream. There will now be a file named gamesave.save on your computer. The .save was just used as an example, and you could use any extension for the file save name.
- This just resets the game so that after the player saves, everything is in a default state.
LoadGame in the Game script is connected to the Load button. Open the Game script and locate the LoadGame function. Replace it with the following:public void LoadGame()
{
// 1
if (File.Exists(Application.persistentDataPath + "/gamesave.save"))
{
ClearBullets();
ClearRobots();
RefreshRobots();
// 2
BinaryFormatter bf = new BinaryFormatter();
FileStream file = File.Open(Application.persistentDataPath + "/gamesave.save", FileMode.Open);
Save save = (Save)bf.Deserialize(file);
file.Close();
// 3
for (int i = 0; i < save.livingTargetPositions.Count; i++)
{
int position = save.livingTargetPositions[i];
Target target = targets[position].GetComponent();
target.ActivateRobot((RobotTypes)save.livingTargetsTypes[i]);
target.GetComponent().ResetDeathTimer();
}
// 4
shotsText.text = "Shots: " + save.shots;
hitsText.text = "Hits: " + save.hits;
shots = save.shots;
hits = save.hits;
Debug.Log("Game Loaded");
Unpause();
}
else
{
Debug.Log("No game saved!");
}
}
Looking at this in detail:- Checks to see that the save file exists. If it does, it clears the robots and the score. Otherwise it logs to the console that there is no saved game.
- Similar to what you did when saving the game, you again create a
BinaryFormatter, only this time you are providing it with a stream of
bytes to read instead of write. So you simply pass it the path to the
save file. It creates the
Saveobject and closes the FileStream. - Even though you have the save information, you still need to convert that into the game state. This code loops through the saved robot positions (for living robots) and adds a robot at that position. It also sets it to the right type. For simplicity, the timers are reset, but you can remove this if you prefer. This prevents the robots from disappearing right away and gives the player a few seconds to get oriented in the world. Also, for simplicity, the animation of the robot moving up is set to finished, which is why robots partly moving up when you saved will be shown as fully up when a game is loaded.
- This updates the UI to have the right hits and shots set, and it sets the local variables so that when the player fires or hits a target it continues to count up on the value that was previously. If you didn’t do this step, the next time the player fires or hits a target the displayed values would get set to 1.
Saving Data With JSON
There’s one more trick you can use when you want to save data — and that is JSON. You could create a local JSON representation of your game save, send it to a server, then get that JSON (as a String) to another device and convert it from a string back to JSON. This tutorial won’t cover sending/receiving from the web, but it is very helpful to know how to use JSON — and it’s incredibly simple.The format of JSON can be a little different than what you might be used from C# code, but it’s pretty straightforward. Here is a simple JSON example:
{
  "message":"hi",
  "age":22
  "items":
  [
    "Broadsword",
    "Bow"
  ]
}
The outer brackets represent the parent entity that is the JSON. If you are familiar with a Dictionary
data structure, then JSON is similar. A JSON file is a mapping of key
and value pairs. So the above example has 3 key-value pairs. With JSON,
the keys are always strings, but the values can be objects (i.e.
children JSON objects), arrays, numbers, or strings. The value set to
the “message” key is “hi”, the value of the “age” key is the number 22,
and the value of the “items” key is an array with two strings in it. The JSON object itself is represented by a String type. By passing this data as a String, any language can easily re-create JSON object from the string as a constructor argument. Very convenient and very simple.
Each language has its own way of creating an object from this format. Since Unity 5.3, there exists a native method to create a JSON object from a JSON string. You will create a JSON representation of the high score of the player and then print it to the console. But you extend this logic by sending the JSON to a server.
The
Game script has a method named SaveAsJSON that is hooked up to the Save As JSON button. Replace SaveAsJSON with the following code:public void SaveAsJSON()
{
Save save = CreateSaveGameObject();
string json = JsonUtility.ToJson(save);
Debug.Log("Saving as JSON: " + json);
}
This creates the Save instance like you did earlier. Then it creates a
JSON string using the ToJSON method on the JsonUtility class. It then
prints the output to console. Start a game, hit a few targets, then press Escape to bring up the menu. Click the Save As JSON button, and you will see the JSON string you created:

If you want convert that JSON into a
Save instance you would simply use:Save save = JsonUtility.FromJson(json);
That is what you would do if you wanted to download a save file from
the web and then load it into your game. But setting up a web server is a
whole other process! For now, pat yourself on the back because you just
learned a few techniques that will… save you some trouble in your next game (groan)!Reference: https://www.raywenderlich.com/160815/save-load-game-unity

No comments:
Post a Comment